Hey Guys!
 I have decided that over next next couple of weeks or so I will do a string of posts trying out and sharing with you guys the Spring/Summer 2013 nail trends that you may want to try out for yourselves! The first one that I decided to do was 'nail jewellery'. Now I found this one particularly interesting as it isn't just a look you can throw together with any old nail polish that is lying around! However, as buying specially designed 'nail jewellery' would probably end up being very overpriced, I looked around my room to try and find something that would make a suitable substitute. In the end, I came across these bead end caps from a broken bracelet that I had kept! I did have to bend them into shape, but that wasn't too difficult. And the upside of these is that you can use them again and again! Luckily they are also very cheap! If you look on eBay and Amazon you can get between 100 and 150 for a pound. This is definitely a more affordable alternative and it doesn't look any different!
To hold the bead end cap in place, I put a layer of top coat onto my nail, laid it down in the correct position and put another layer of top coat over the top. I waited for this to dry and it held it in place well. You can use nail jewellery as a statement look on one finger, to add a bit of edge to your normal coat of colour, or if you use smaller more subtle jewellery you could use it on all of your fingers!
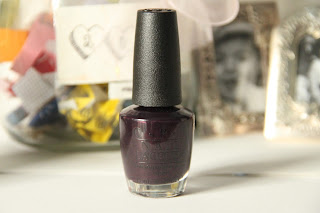
The base nail polish I used is one of my favourites: 'Black Cherry Chutney' by O.P.I. I have been wanting this colour for ages and I finally got my hands on it on Tuesday! Its a rich dark purple shades with a subtle fuchsia shimmer.
You can buy this shade from many beauty suppliers and Amazon in the UK and it may also be available to purchase at Debenhams depending what the have in stock at the time.
Overall I just think that this look is so easy to do and adds so much individuality and flair to your look! It is really worth doing so give it a try!
Clio
xox


